
Pixel Perfect is a new series of pixel art related articles. They will feature a wide range of guides and tutorials for Habbo-based pixel art, including furniture, effects and alterations. If you’re new to pixel art, then these might be of use to you to help you learn how to make some basic habbo-style images… and, who knows? You might be applying to be a Pixel Artist at Habbox by the end of the week!
I thought I’d start with something simple. Partly because I’m still getting used to the software I’m using to create the gifs and need to practice. I’ll be starting with. as you can guess from the title, the laughing expression! This will be a part of a series of facial expressions, released gradually throughout the upcoming weeks. Habbo have a few facial expressions as it is, which show when you type in certain emoticons in-chat, including the smile, frown, anger, shocked, and even a laugh! Here are a few that I think would be a nice, if not weird, addition to the game.
Step 1: Remove the face
Choose the skin colour of your habbo and simply colour over its face. I think it’s easier to work with a blank canvas so I can see what I’m doing better.
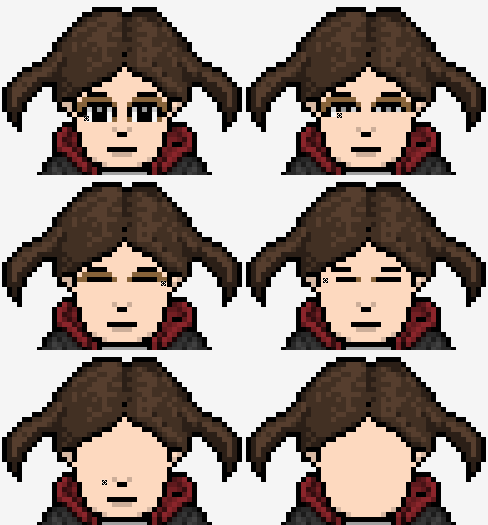
Step 2: Eyes
Just below the ear, leave two spaces and draw one pixel
On the top right of that draw 4 pixels in a straight line (going right)
Draw another one to the bottom right of that one
Leave two spaces and then do the same again for the second eye.
Both eyes should be two spaces apart and centered, leaving the same amount of spaces on both left and right sides. If this isn’t the case, move them around until they’re right in the center!
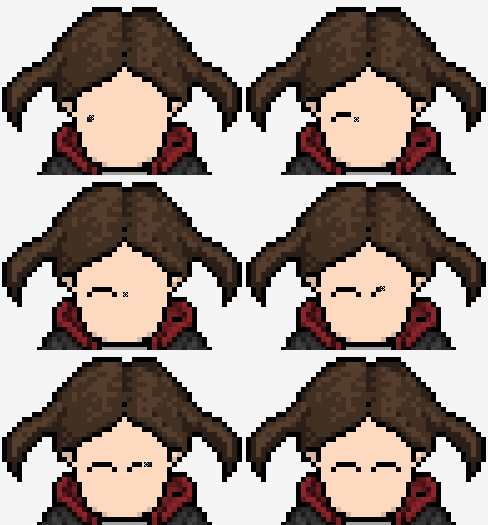
Step 3: Eyebrows
Look at the 4 pixels in a line you drew for the eyes and, starting from the 4th pixel (the one closest to the center of the face), count 4 pixels up, but don’t draw anything.
Starting from the the 4th pixel you count, draw 3 pixels going left.
From the bottom left of those three, draw two going the same direction.
Finally, on the bottom left of those two, draw just one pixel.
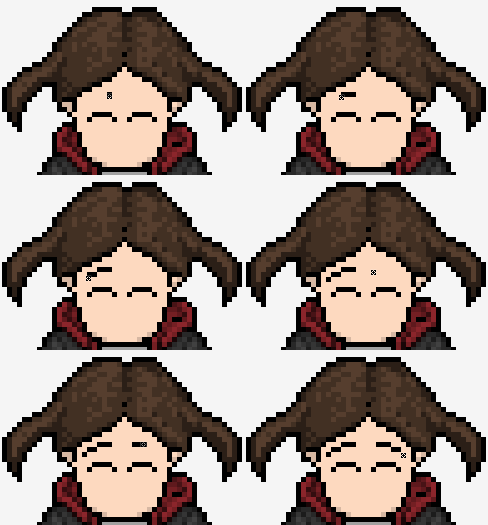
Step 4: Nose
Going back to the eyes, look at the single pixels that are closest to the center. Underneath those add a shade pixel. This should be darker than the original skin tone.
If you’re using the same skin colour as the example, the colour you need is #ccae99. However, if you are using a different skin tone, you will be able to find the correct colour by looking at the nose in the original photo of your habbo. Look for a darker colour around the nose, select it and use it for this image. One pixel of this colour needs to be placed underneath each single pixel that are closest to the center of the face. If this doesn’t make sense to you, look at the example gif below.
Once you’ve added the shaded pixels, they need to be connected by two black pixels. The two black pixels should be underneath them and right in the center.
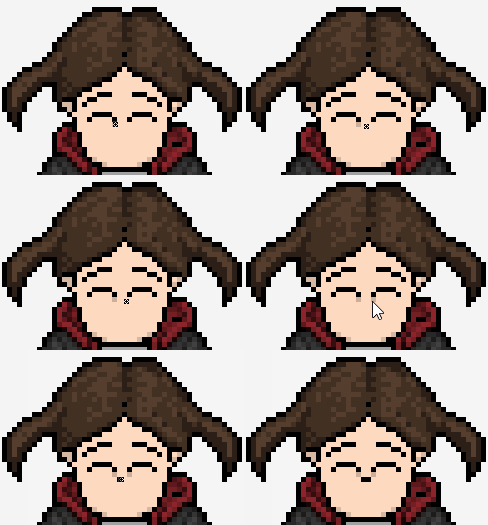
Step 5: Mouth
After drawing the nose, move down and skip one line of pixels. On the second line draw two black pixels so they are aligned with the nose with one one space in between.
To both the left and right of these two pixels, extend it by 4 pixels. This should leave you with a straight black line, centered.
Looking at the pixel on the far left of the mouth, go down 1 pixel and 1 to the right, place another pixel here. Again, go down 1 pixel and 1 to the right from the pixel you’ve just placed. Place another pixel here.
Go to the right side of the mouth and copy what you’ve just done, but going to the left instead of the right.
The bottom pixels need to be connected now. Go to the line underneath and draw a line of pixels, starting and finishing diagonally from the two pixels. No pixels should be underneath the original two pixels, only in the center.
Underneath this line, there should be two shaded pixels (the same colour that you used for the nose in the last step) placed in a line in the center.
Fill in the mouth with a white-ish colour. In the example, I’m using the colour #f5f5f5.
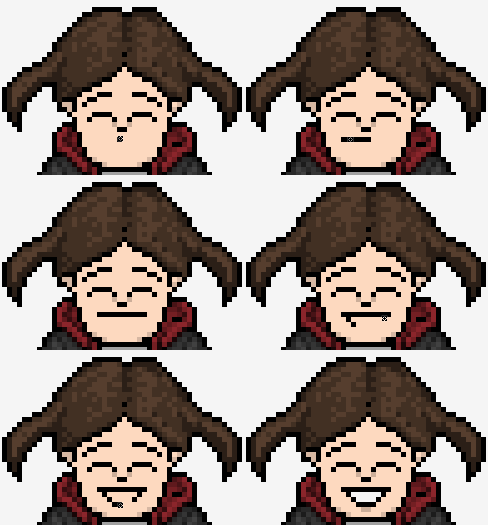
Step 6: Tears (optional)
Look at the single pixel on the outside of the left eye and place two blue pixels going down from it (#55cdff)
To the right of those two blue pixels, place another two going down, creating a 2×2 square.
Going back to the single pixel on the outside of the eye that you were originally looking at, place two blue pixels in a line to the right of it.
Copy this pattern on the other side.
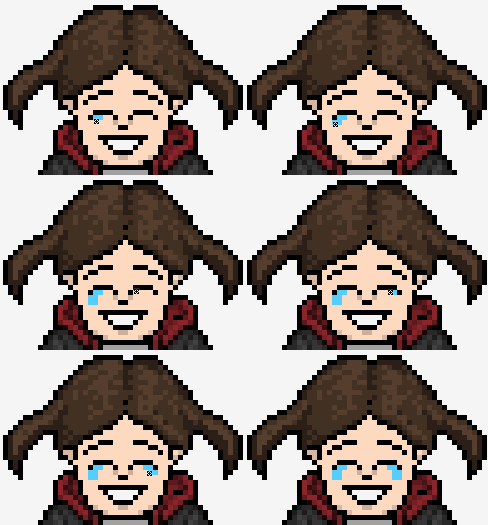
And then… you’re done!
Let me know how you get on below! Or feel free to share any ideas for improvements or for future tutorials!
Big thanks to Lucpix for his help in creating this alteration.
 (No Ratings Yet)


Thank you for the amazing guide Sho! 😀
oo, how interesting.. I feel the urge to try now..
do it! i’d love to see