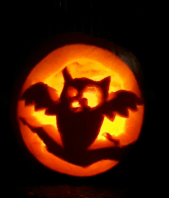
It’s that time of the year again where we all grab our pumpkins and try to make them spooky! From the traditional scary face to detailed celebrity heads and everything in between. Read more to learn how you could carve the perfect pumpkin this Halloween 🙂
Before you start your pumpkin you’re going to need the following:
- Pumpkin (obviously)
- Knife
- Spoon
- Pin
- Bowl
- Marker Pen
- Candle
The first thing you’re going to have to do is choose your pumpkin, a large clean pumpkin will make the best for carving but don’t worry if your pumpkin has a dirty side as you typically only need to carve one side. Once you have your pumpkin you’re going to need to get its ‘guts’ out! Using the knife, cut around the top of the pumpkin and pull the top off – put it to one side, as you’re going to need it later. Using the spoon, scoop out all the insides of your pumpkin and put them in the bowl. On the side that you’re going to carve the pumpkin scrape some of the inside away to make it easier to carve.
Now your pumpkin is empty it’s time to decide what design you want to go for. Take y our marker pen and go crazy with a spooky design or if you’re stuck for ideas there are LOADS of templates and ideas you can find online; this year I went for an owl instead of the spooky face, as you can see to the side. Once you have the outline of your design on the pumpkin it’s ready to start cutting it up! If you’re feeling brave you can go right in with a knife, or if not then use a pin, just poking your pumpkin around where you want to cut it first so that you have a perforated guide.
Now you should have a perfectly carved pumpkin and all you need to finish is to light it up. Place a small candle inside your pumpkin and pop the top you put aside earlier back on and your pumpkin should now be complete and ready to scare people.
Enjoy, and a very Happy Habboxween to everyone!


 3
3


