You will need:
If you’re building a shopping centre, or even just looking for something fun to add to your events rooms – automatic doors are a must! Follow this guide if you want to add one to your room.
Step 1: Set up your room
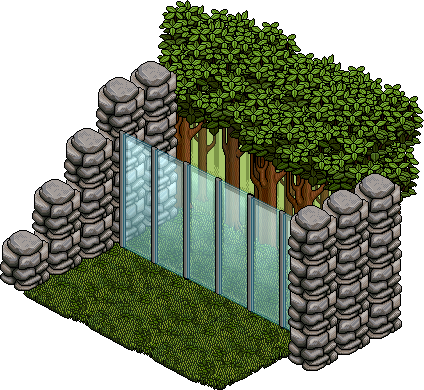
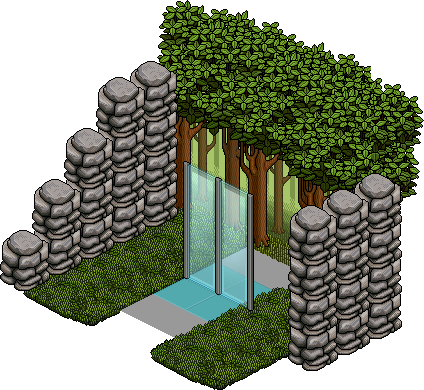
Your room needs to have at least 4 Glass Dividers placed next to each other. If you want to add more, that is fine too. In my example below I have added six. Look at the image below to get an idea of how it should be set up.
Step 2: Add the tiles
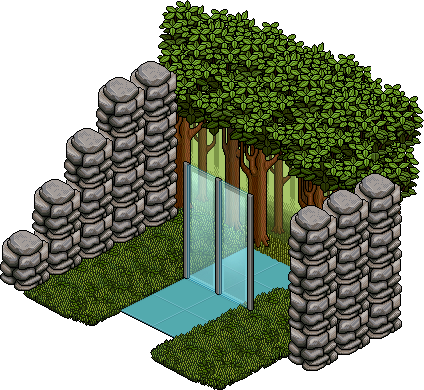
Place the Spa Tiles in two rows of four underneath the Glass Dividers. Make sure that the Glass Dividers are placed in the centre of the tiles, so that they have a 2×2 block of Spa Tiles on both sides, as shown in the image below. While you’re building. it might be best to remove the extra Glass Dividers (the ones that are not on the tiles).
Step 3: User Walks On Furni (Stack 1)
Place WIRED Trigger: User Walks On Furni (x1) and set it to the four Tiles that are CLOSEST to the doors.

Step 4: Move and Rotate Furni (Stack 1)
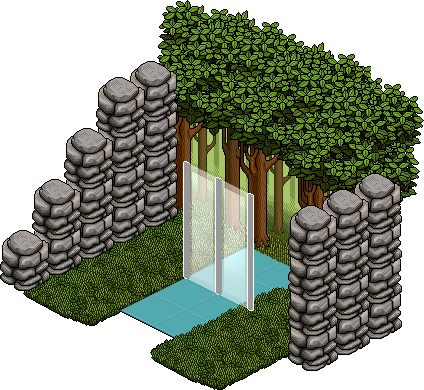
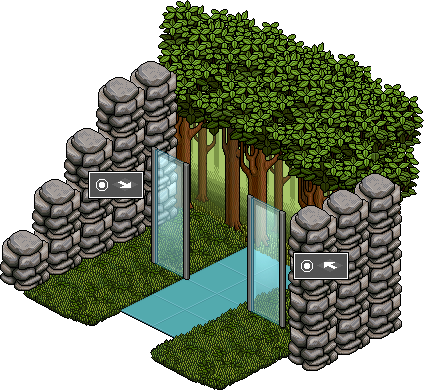
Place Wired Effect: Move and Rotate Furni (x2) and place them on top of the WIRED Trigger: User Walks On Furni used in Step 3. Open the first one, select the Glass Divider that is on your left, and select the direction that is pointing upwards. Make sure it’s set to not rotate and then click OK. Now open the second one, select the other Glass Divider and set it to move downwards. Again, no rotation and then press OK. The image below will show you which direction each one should go to.

Step 5: Condition (Stack 1)
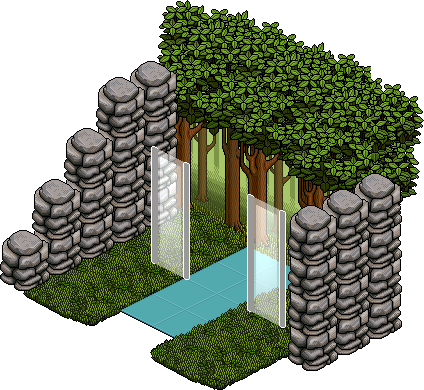
Place WIRED Condition: Furni States and Positions Match (x1) on top of the stack you’re currently working on. Open it and select the Glass Doors while they are in the centre (on top of the tiles) – where you want them to be when the doors are CLOSED. Now, when you step on the tiles closest to the Dividers, they should open.
Step 6: User Walks Off Furni (Stack 2)
Now we’re starting a NEW stack. Place WIRED Trigger: User Walks Off Furni (x1) and set it to the four Tiles that are furthest away from the Glass Dividers.
Step 7: Move and Rotate Furni (Stack 2)
Now that the Dividers opens when you walk towards them, we’re going to make them close when you walk away. Place Wired Effect: Move and Rotate Furni (x2). Open them and select a Glass Divider. Set the direction it will need to move when it’s open so that it will be shut again. Set it to not rotate and click OK. Do the same with the second WIRED for the other Glass Divider. The image below should give you an idea.
Step 8: Condition (Stack 2)
Place WIRED Condition: Furni States and Positions Match (x1) on top of the stack you’re currently working on. Open it and select the Glass Doors while they one square next to the tiles – where you want them to be when the doors are OPEN. Now, when you step on the tiles furthest from the Dividers, they should shut.
Step 9: Test it out
If the Dividers open and shut as they should, you are ready to move on to Step 10. If not, go back through the steps in case you have missed something. It’s easy to misslick!
Step 10: Cover it up
Using the Stack Tile, place the flooring you have chosen for your room on top of the Spa Tiles to hide them. Then you can place the extra Glass Dividers back into their positions. Now you’re all done!


